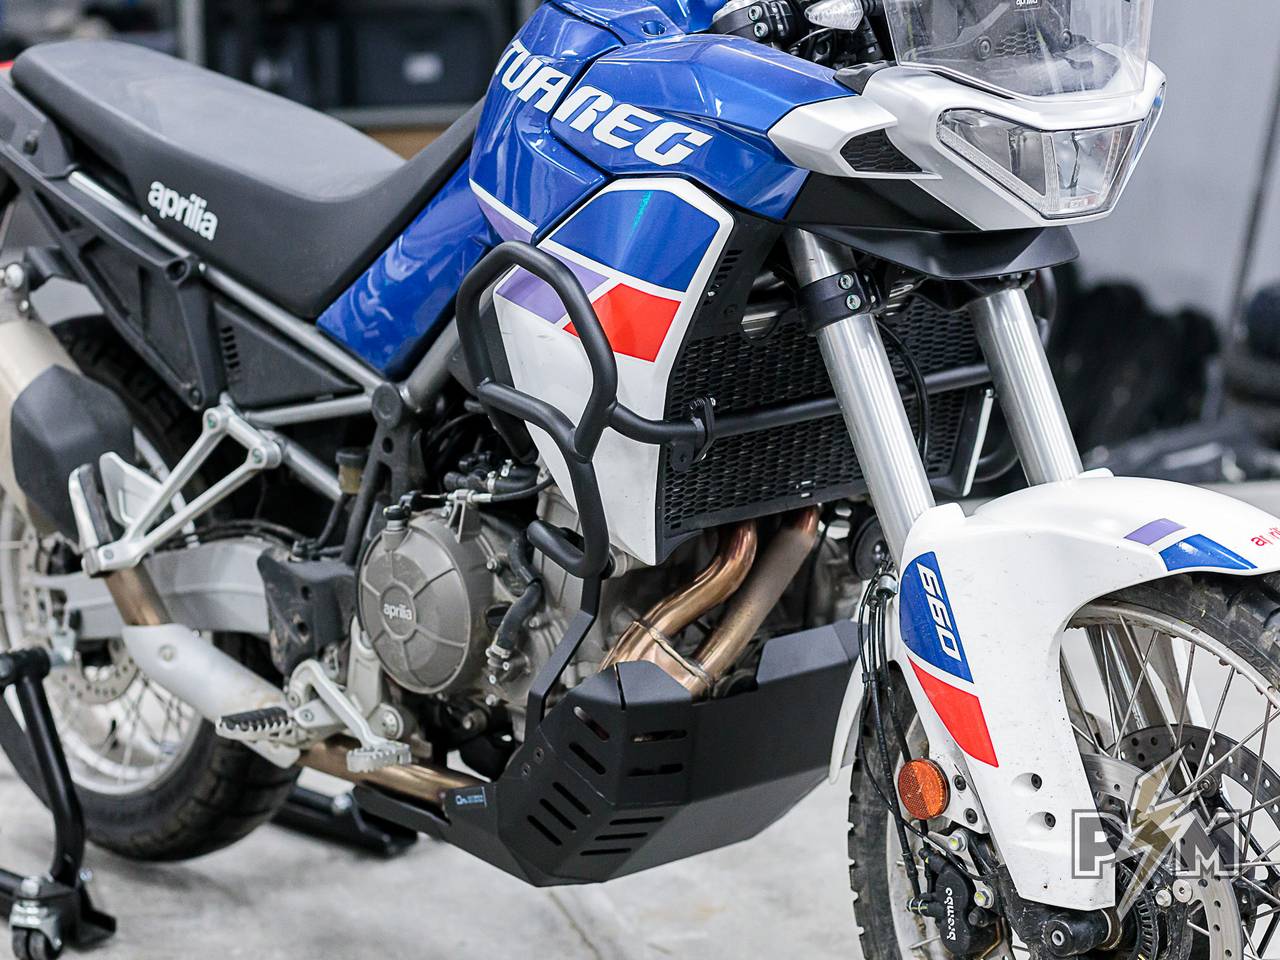

Outback Motortek crash bars and skid plate on Aprilia Tuareg 660
Generally, I’m not a fan of crash bars. Having said that, in my opinion, Tuareg needs some serious protection boost if it’s going to be ridden off-road. And ours will be, a lot. In stock form, the radiator is completely unprotected from side impacts. And that’s a disaster just waiting to happen.

OEM skid plate is likely an adequate protection against small debris thrown by the front wheel. For riding in more demanding terrain, and to offer protection to vital engine parts, more substantial protection is needed.
Enter Outback Motortek crash bars and skid plate. Outback Motortek has a solid reputation, and I liked the design. Since crash bars and skid plate come as a set, choosing them was an easy decision to make. That way I’m avoiding any possible compatibility issues.


I’ll say it now: installation of both crash bars and skid plate was a straight forward process. All holes line up perfectly, all hardware is in the package. I will not go deeply into the entire process as there are good Video instructions on Youtube.
Crash bars tip the scales at 3.9kg (8.6lbs), all mounting hardware included.

Tools needed for installation:
-13mm socket with rachet
-10mm wrench (socket would also work)
-8mm socket
-8mm hex key

To install crash bars only two bolts have to be removed from the bike. Keep in mind that these bolts are holding the engine, so only work on one side of the bike at a time.

After installing left and right sides, I installed the crossbar. It mounts to the underside of the lower triple clamp. There’s not a lot of room to access the bolts, so socket with jointed handle came in handy. Bolts connecting the crossbar with left and right sides come with nyloc nuts so no Loctite was used there.

Since I was installing the skid plate at the same time, all bolts were left loose for now.
Outback Motortek skid plate weighs in at 4.1kg (9lbs), all mounting hardware included. OEM skid plate has 1.4kg (3.1lbs) so weight difference is 2.7kg (5.95lbs)


Tools needed for installation:
-10mm socket
-10mm wrench
-8mm socket and extension
-4, 5 and 8mm hex keys.

Removing OEM skid plate is straight forward. Just don’t forget to remove rubber grommets from the right side of the bike. I decided to leave rear OEM mounting bracket in place. It doesn’t interfere with the new skid plate, and it might offer some additional protection.
Video instructions show all the steps.
Due to limited accessibility, it took a while to remove the lower bolt on the right side of the bike. Ratcheting 10mm wrench would make this a lot easier but alas.
Upper brackets use the same bolts for mounting as crash bars. That’s why all crash bars bolts were left loose.

To make installation of the skid plate onto the brackets easier, I used a scissor jack. At this point, all brackets are still free to move, and it was easy to line up the holes. Eight countersunk bolts come with nyloc nuts, no Loctite needed there.
After checking the alignment, it was time to tighten everything. First up, nuts and bolts securing the skid plate to the brackets. Next, the bolts securing the brackets onto the bike.

Then it was time to move onto the crash bars, first tightening large bolts and then moving to the smaller ones.
I used blue Loctite on all bolts (crash bars and skid plate), except for the ones with nyloc nuts.

Working very slowly, it took me around 2.5 hours to complete the entire installation. It can be done in a much shorter time.
All in all, I’m happy with the new looks of the bike. I’m hoping to never test the protection these crash bars and skid plate offer, but we all know how it goes… First big solo trip with Tuareg is just around the corner, and I feel a lot more comfortable knowing that vital, vulnerable, parts are protected.


